Interchangeable Holiday Picture Frame with Felt Shapes
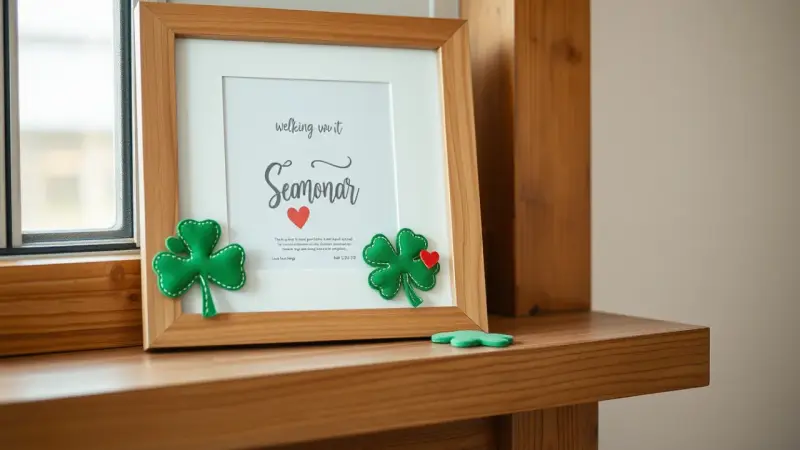
A plain frame with a flat border can carry a small green felt shamrock, stitched in white thread, with a tiny heart at its center. Behind the glass sits a seasonal print. Because the felt attaches with velcro, you can take the shamrock off in March and put a different shape on in April.
The idea is one frame that works for every holiday. You change the print inside and the felt shape on the border, and the frame itself never needs replacing.
Where it fits
This frame suits a mantel, a bookshelf, an entryway table or a desk. It is a small, inexpensive way to mark a holiday without bringing out a whole box of decorations. The shamrock version works well for St. Patrick’s Day, and the same method works for other seasons. Think of a felt heart for Valentine’s Day, a pumpkin for fall, a star for the Fourth of July, or a tree for Christmas.
It also makes a good handmade gift. Give the frame with a few felt shapes and matching prints so the recipient can swap them through the year.
What you need
- A frame with a flat border wide enough to hold a small shape
- A holiday print sized to fit the frame
- Green felt, or another color for a different holiday
- White embroidery floss
- A sewing needle
- Scissors
- Velcro, either self-adhesive or the plain kind plus glue
How to make it
- Trim your print to fit and place it in the frame.
- Draw a shamrock. You can sketch one freehand, or build one in a word processor by arranging three heart shapes around a center point and adding a short stem. A shamrock about 2 inches wide fits nicely on a standard border.
- Print or trace the shape, cut it out, and use it as a pattern to cut the shamrock from green felt.
- Thread the needle with white embroidery floss and stitch around the edge of the shamrock. A simple running stitch looks neat and is easy to do. Stitch a small heart in the middle if you like.
- Attach the rough, prickly side of the velcro to the frame border where you want the shape to sit. Self-adhesive velcro presses right on. If yours is not sticky, glue it down and let it dry fully.
- Press the felt shamrock onto the velcro. Felt grips the hooks by itself, so the shape needs no velcro of its own.
Mistakes to avoid
Putting velcro on the felt. The soft side is not needed here. Adding it just makes the shape thicker and harder to remove neatly.
Using a border that is too narrow. If the flat border is slim, the shape will overhang the edge or tilt. Pick a frame with a flat border, or make the shapes smaller.
Skipping the glue on non-sticky velcro. Plain velcro will peel off if it is not glued down. Let the glue set before you attach any felt.
Making shapes with thin points. Narrow tips of felt can curl and flop. Choose chunky, simple outlines such as hearts, stars, pumpkins and trees.
Pressing too hard when removing a shape. Peel the felt away gently from one edge so the velcro stays put on the frame.
Storing your shapes
Keep the extra felt shapes flat in an envelope or a shallow box, labeled by holiday. Store the matching prints with them so everything for each season comes out together. With a stack of shapes and prints ready, switching the frame takes about a minute.
If you plan to make several shapes, cut them all at once and stitch them in an evening. Use one color of floss for every shape so they look like a set, or pick a contrasting color for each holiday.