Washi Tape Rocket Art for a Space-Loving Kid’s Room
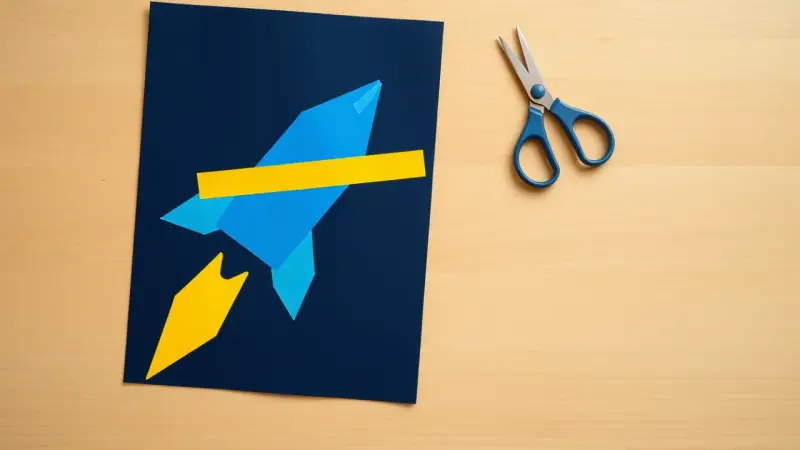
A bold blue rocket with a bright yellow flame, set against deep navy cardstock and tucked into a frame: this washi tape rocket art is graphic, quick and made almost entirely from paper and tape. It suits a boy’s or girl’s bedroom, a playroom shelf or a space-themed birthday party table.
The whole project takes a short sitting, and the tape does the decorating for you. Here is what you need, how it goes together, and what to watch for.
Where this piece fits
The navy and blue palette works well in a room that already has rocket or space bedding. It also looks good with white walls, light wood shelves and simple frames. Because the finished piece is flat and lightweight, it sits easily on a shelf, leans on a dresser or hangs on the wall.
Make a few in different sizes for a gallery-style group. You can also swap the colors: red tape for a rocket, orange for the flame, and black cardstock for a night-sky look.
How to make it
Supplies
- A frame in the size you like
- Navy cardstock, trimmed to fit the frame opening
- A rocket shape cut from paper or cardstock
- Blue washi tape for the body
- Yellow washi tape for the flame
- Scissors
- A glue stick
A cutting machine makes a neat rocket quickly. If you don’t have one, find a simple rocket outline, print it, and cut it out by hand. A bold, chunky shape is easiest to cover with tape.
- Lay strips of blue washi tape across the rocket shape, side by side, so they sit flat against it.
- Keep adding strips until the whole rocket is covered, with the tape running past the edges.
- Peel the taped shape away from your work surface, then trim around the outline to remove the extra tape.
- Cover the flame section with yellow washi tape and trim it the same way.
- Glue the rocket and the flame onto the navy cardstock with the glue stick, leaving a little space between the flame and the rocket body if you like.
- Slide the cardstock into the frame.
Scissors are the only sharp tool here. Younger children can help with the taping, while an adult handles the cutting. Keep the small trimmed scraps away from children under three.
Mistakes to avoid
- Overlapping the strips too much. Butting the edges together gives a smooth finish. Heavy overlaps make bumps that show once the piece is framed.
- Trimming before peeling. Peel the taped shape off the surface first, then cut. This keeps the edges clean.
- Choosing a shape that is too detailed. Thin fins or tiny windows are hard to tape. Pick a simple outline, or add details later with a marker or small tape scraps.
- Using too much glue. A thin, even coat with the glue stick is enough. Wet glue can wrinkle the cardstock or loosen the tape.
- Cardstock that does not fit. Measure the frame opening before you cut, so the navy background lies flat and the rocket stays centered.
For a little extra interest, add a few stars cut from scraps of yellow or white tape around the rocket. Or tape a thin strip along the bottom for a launch pad. Washi tape comes in many patterns, so stripes or dots on the rocket body also look great. If you want to change the art later, make the rocket on its own piece of cardstock and swap it out for a new one as the seasons or interests change.