Holly Jolly Christmas Sled: A Painted Wooden Sled with Stenciled Lettering
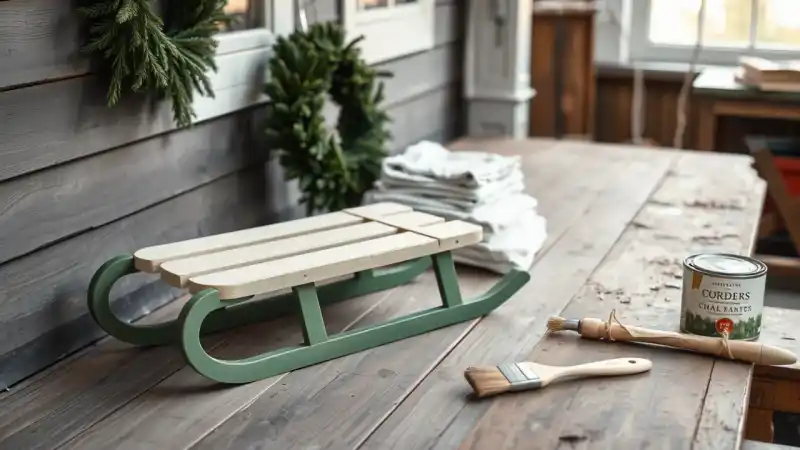
This Holly Jolly Christmas sled has green bottom rails and a creamy seat. A festive red or pink holiday message is stenciled across the seat, and a coat of soft wax gives the paint a smooth, aged finish. It sits well on a porch, by the front door or beside the tree.
The project uses a small unfinished wooden sled and chalk-style paint, so it needs no sanding or priming. Here is how it comes together.
What do you need to make a painted Christmas sled?
Gather these supplies before you start:
- A small unfinished wooden sled from a craft store
- Chalk-style paint in green, cream or off-white, and a holiday red or pink
- Creme-style furniture wax
- Adhesive vinyl, or a ready-made vinyl stencil
- Foam brushes
- A lint-free scrap of fabric, such as old flannel
- Plastic cling wrap with a grip, such as Press n’ Seal, to use as transfer tape
- A cutting machine such as a Cricut, if you are cutting your own lettering
The brand of paint matters less than the type. Chalk-style paint sticks to bare wood well and dries to a matte surface that takes wax nicely.
How do you paint the sled?
Start with the base coats, using a foam brush for smooth coverage with few brush marks.
- Paint the bottom rails green.
- Paint the seat cream or off-white.
- Let both colors dry fully. If the wood still shows through, add a second thin coat and let it dry again.
Work in thin layers. Thick paint can crack or leave ridges, and it takes much longer to dry.
How do you add the Holly Jolly lettering?
While the base coats dry, make the stencil. Design a short holiday phrase, such as “Holly Jolly Christmas”, in a bold font, with a little holly or a few berries if you like. Size it to fit the seat with a margin all around. Cut it from vinyl on a cutting machine. You can also trace and cut it by hand with a craft knife, or buy a ready-made stencil.
Once the base paint is completely dry, apply the stencil:
- Lay cling wrap over the cut vinyl and press so the letters stick to the wrap. This is cheaper than regular transfer tape.
- Peel the backing away and position the letters on the seat.
- Rub the vinyl down firmly, especially around the edges of each letter, then peel the wrap away.
- Dab red or pink paint over the stencil with a barely damp foam brush. Dabbing instead of brushing keeps paint from creeping under the edges.
- Let the paint dry, then peel the vinyl away carefully.
How do you finish it with wax?
Wax seals the paint and adds a soft sheen. Dip a lint-free cloth into the wax and rub it over the whole sled in generous, even layers. Cover the lettering, seat and rails. Let the wax dry completely before you move or display the sled. Flannel works well because it leaves no fibers behind.
Clear wax keeps the colors true. Dark wax settles into the grain and edges for a more vintage look. Work a small section at a time if you use dark wax, so it does not dry before you can wipe it back.
What mistakes should you avoid?
- Stenciling too soon. Vinyl on tacky paint can pull the base coat off when you peel it.
- Loading the brush with too much paint. This is the most common reason for bleeding under the stencil.
- Skipping the wax. Unwaxed chalk-style paint scuffs easily.
Where should you display it?
Lean it by the fireplace, tuck pine branches and ornaments onto the seat, or set a few wrapped gifts on top. Because the wax is not a weatherproof coating, keep it on a covered porch or indoors.